Getting Started with Julia Modules
Julia modules allow you to collect sets of objects and functions. The benefit of using modules is that they can easily be loaded and shared, which makes the research workflow a lot more streamlined if code is relevant for multiple projects.
This post is a tutorial on how to create a personal Julia module. As an illustration, I use my applied econometrics module MyMethods.jl. You can find the most recent version of the package on github.com/thomaswiemann/MyMethods.jl.
Three key aspects will be covered:
- Creating a blank module
- Setting up Git and GitHub
- Development workflow
Before you get started, make sure you’ve completed the preliminaries: 1) Julia is installed together with your favorite IDE (e.g., Atom); 2) Git is installed and configured; 3) You have a GitHub account.
Creating a blank module
In theory, we could create all the files of the module from scratch, but starting at zero is a pain. Luckily, PkgTemplates.jl provides the kick start we need: the basic structure of our Julia module to which we can then add the interesting bits.
Open your favorite IDE and make sure that PkgTemplates.jl is installed. (If not using Pkg; Pkg.add("PkgTemplates") will do the trick.) For the MyMethods.jl module, I then simply run the following code:
using PkgTemplates

# Create a template
t = Template(user = "thomaswiemann",
             authors = "Thomas Wiemann <wiemann@uchicago.edu>",
             dir = "/home/thomas/GitHub",
             julia = v"1.4",
             plugins = [
                 License(name = "MIT"),
                 !Git,
                 !CompatHelper,
                 !TagBot
             ])

# Create the package
t("MyMethods")
The function Template() allows us to specify a handful of options. I typically suppress Git here and instead configure it manually (see the next section). Make sure to edit the name, email, and working directory of your module before running the code yourself. The last line of the code specifies the module name. It is convention in Julia that module names are capitalized and use camel case.
Once the module is initialized, navigate to its directory. In my case this is /home/thomas/GitHub/MyMethods. You should see a few files and two folders there. Lets go over each:
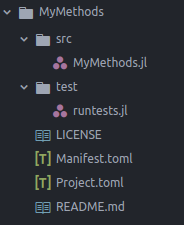
- The
srcfolder contains the content (or: source code) of your package. At the moment, it contains a single.jlfile with your project name. - The
testfolder contains a single fileruntests.jl, which we will use later to ensure the module is working as intended. LICENSEspecifies how others may use and share your code.Manifest.tomlis a machine generated file – best to leave it be.Project.tomlcontains package info such as dependencies and authors.README.mdcan contain useful descriptions or comments on your package.
Notice that there is no a version control file in the project folder. This will change in the next section.
Setting up Git and GitHub
Git and GitHub are excellent utilities for keeping track of your project and sharing it with others. This section illustrates how your newly created (and still largely empty) module can be hosted on GitHub.
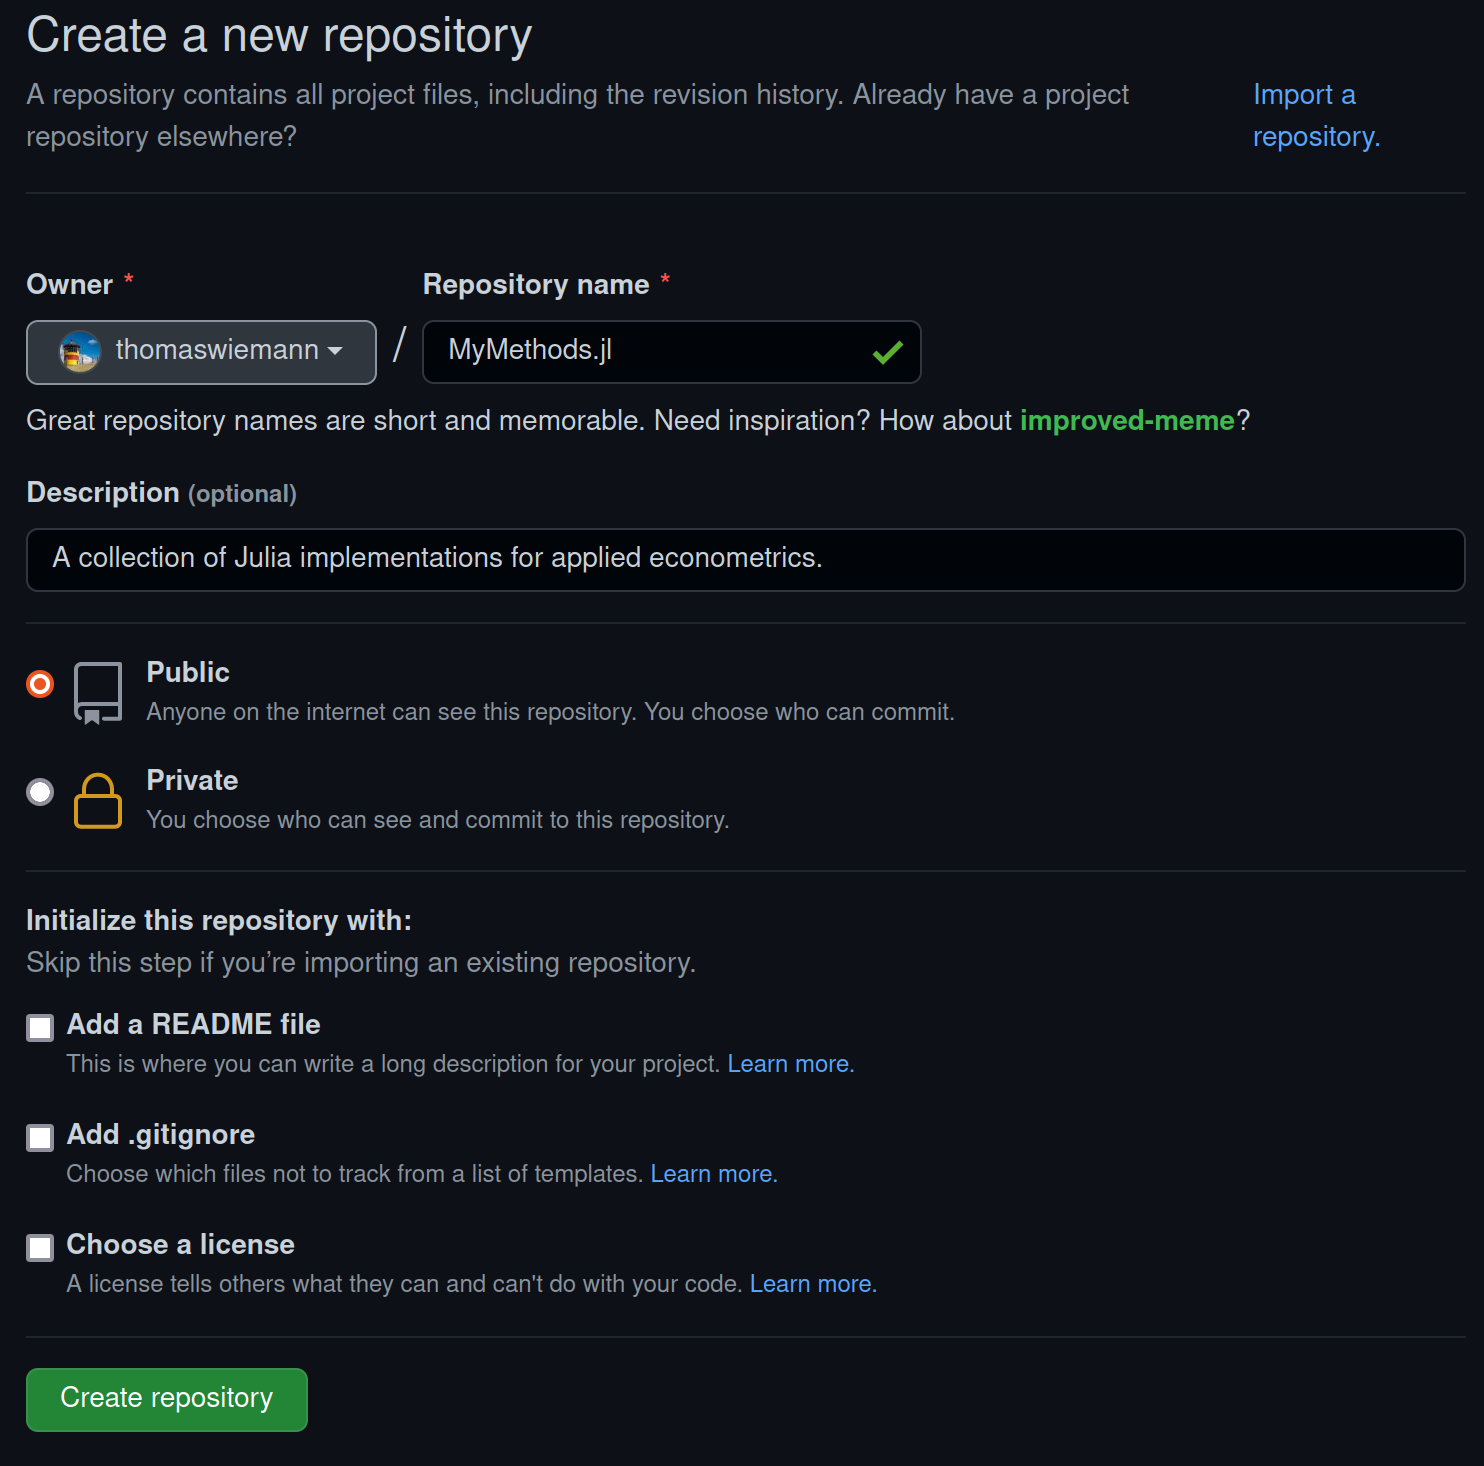
To get started, login at GitHub.com and create a new repository. Make sure to give the repository the same name as your module but append a .jl at the end of the repository name. Do not create a license or README file. Whether you want others to see your Julia module (public) or keep it for yourself (private) is of course up to you.
Once the repository is created, Git needs to be initialized in the local module directory. This is easily done with the terminal. Simply open a terminal and navigate to the folder where your module is stored (in my case, this is /home/thomas/GitHub/MyMethods). Then execute the following commands:
git init # this initializes git for the module
git add . # this adds all current files
git commit -m “initial commit” # our first commit
git branch -M main
git remote add origin git@github.com:thomaswiemann/MyMethods.jl.git
git push -u origin main # this uploads the code to GitHub
You should now be able to see your module on GitHub. If you’re repository is public, users can install your module directly from GitHub. In my case, it looks like this:
using Pkg;
Pkg.add(url="https://github.com/thomaswiemann/MyMethods.jl")
The module is rather useless in its current state, as we’ve not added any content. We’ll change this in the next section.
Development workflow
This section illustrates the development workflow. As an example, we will walk through adding a simple linear regression object to the MyMethods.jl module.
To add content to the module, I create a new file called myLS.jl, stored inside the FUN folder. You can download the file here: myLS.jl.
The file contains two main parts. First, I define a new composite type (using: struct) whose constructor takes a vector y of outcomes and a matrix X of features and calculates the least squared coefficient (i.e., $\hat{\beta}=(X^\top X)^{-1}X^\top y$). The coefficient and the inputs are then are combined into a new object of type myLS. Second, I create set of complementary methods that can be called on an object of type myLS. This includes a method called inference which calculates standard errors.
As one expects, calculation of the least squares coefficient required some linear algebra functions, not all of which are contained in Base Julia. An excellent collection of linear algebra functions is provided in the package LinearAlgebra.jl, which needs to added to the package dependencies.
The procedure for adding dependencies is as follows: First, open the Julia REPL (e.g., by typing julia in your terminal or executing julia.exe, depending on your OS) and set the working directory to the module folder (in my case, this is /home/thomas/GitHub/MyMethods). Second, enter the package mode via ]. Third, run the command activate .. The terminal should now start with your package name rather than specify the version number of Julia. Finally, add dependencies using the add command.
The following figure illustrates how this process looks in the case of the MyMethods.jl module:
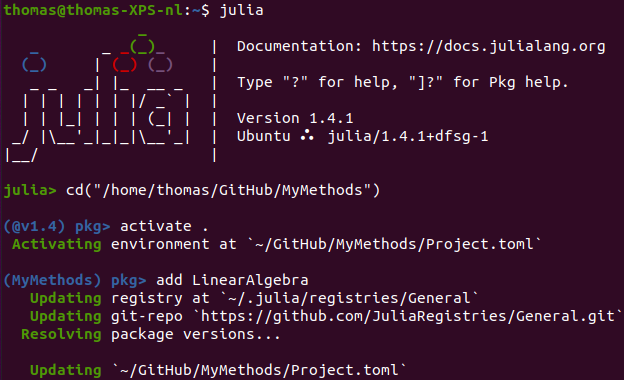
This will automatically amend your Project.toml and Manifest.toml files with the necessary details. The other dependencies – Distributions, Random, and DataFrames – can be added in the same fashion.
We’re now ready to include the newly defined object in our project. This is done by editing the MyMethods.jl file in the src folder. In addition to the dependencies, we need to specify which objects and methods should be available to users who load the module, as well as specify the location of our source code. In my case, the edited file reads:
module MyMethods

using LinearAlgebra, Distributions, Random, DataFrames

export myLS
export coef, predict, inference

include("FUN/myLS.jl")

end
This looks good already! As a final step, we should make sure the added features have the desired functionality. You will inevitably test your functions when developing your code, but chances are, you’re not (yet) doing it in a particularly reproducible manner. Since it’s zero added effort, I recommend writing a little test in the runtest.jl file. You can download the tests I specified for the myLS object here: runtests.jl.
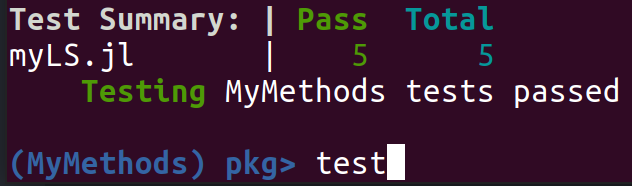
Once you’ve written your test, you can run it in the REPL. If your project is already active, simply executing the command test suffices. If you’re as lucky as me, good news awaits! Otherwise, revise your implementation and retry your tests.
Once all your tests are successful, your newly created functions are ready for use. I recommend committing your changes in git and uploading the new version of your package to GitHub. You can do this via the terminal. Once navigated to the module directory, run the following commands:
git status # this shows you which files you have edited
git add . # this adds all files to the new commit
git commit -m "adds myLS.jl" # commit your changes
git push # this uploads your code to GitHub
This concludes the basic workflow of 1) adding features to the module, 2) testing the module, and finally 3) committing the changes to Git and uploading the new improvements to GitHub.
As a final advice, I recommend making use of Revise.jl when developing your Julia modules. With this package, your working environment is automatically updated whenever you edit source code (a huge quality of life improvement). Once installed, (using Pkg; Pkg.add("Revise")), start the Julia REPL and navigate to your module directory. Then execute the following commands in turn: 1) using Revise, 2) ] (to enter the package mode), 3) dev .. Now you’re all set: much success with your Julia development and happy coding!